ASSEMBLING THE BODY - 3
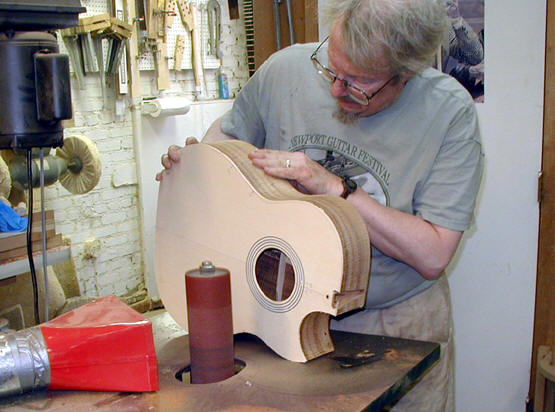
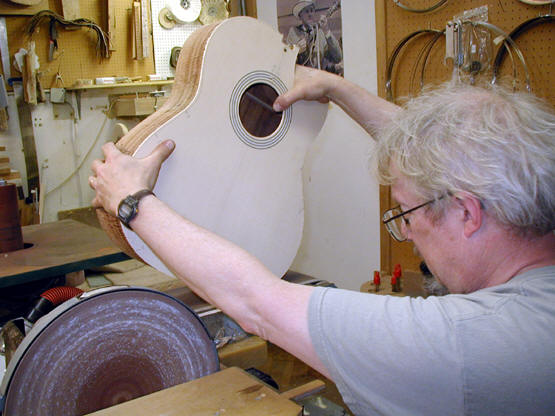 After the top and back have been trimmed, I sand the sides on the
belt sander. The purpose is to even out any irregularities in the
sides. This may be either a slight irregularity in the profile or
a bit of waviness in the side (i.e. from the top to the back, or across
the width of the side) This looks much more dangerous and frightening
in the photo than it actually is. I use a fairly fine grit belt
(about 150 or 120 grit) and use a very light touch. You will notice
in this and the other photos that I always have two hands on the guitar,
and that as much as possible have one hand on "top". The
other important element of the technique is that the body must always
be moving, and should be moving when first contact with the belt is made
-- sort of like landing an airplane.
After the top and back have been trimmed, I sand the sides on the
belt sander. The purpose is to even out any irregularities in the
sides. This may be either a slight irregularity in the profile or
a bit of waviness in the side (i.e. from the top to the back, or across
the width of the side) This looks much more dangerous and frightening
in the photo than it actually is. I use a fairly fine grit belt
(about 150 or 120 grit) and use a very light touch. You will notice
in this and the other photos that I always have two hands on the guitar,
and that as much as possible have one hand on "top". The
other important element of the technique is that the body must always
be moving, and should be moving when first contact with the belt is made
-- sort of like landing an airplane.
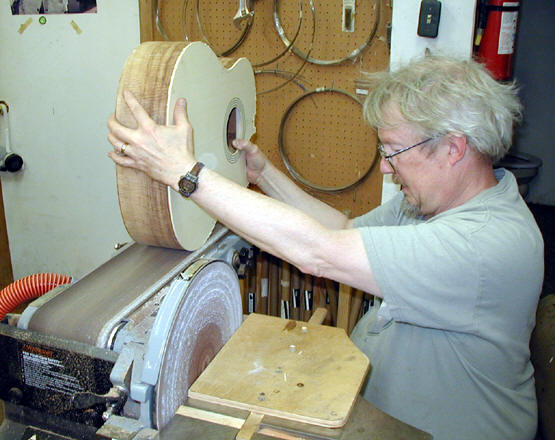 Here I am just about to "land" the side on the end of the
sander for sanding the curve in the waist of the guitar. The waist
is the hardest part of this technique. Sanding the "outside
curves" is actually very easy if you keep the body moving and use
a light touch. Recently I have been using my oscillating spindle
sander for the waist area and it works very well.
Here I am just about to "land" the side on the end of the
sander for sanding the curve in the waist of the guitar. The waist
is the hardest part of this technique. Sanding the "outside
curves" is actually very easy if you keep the body moving and use
a light touch. Recently I have been using my oscillating spindle
sander for the waist area and it works very well.
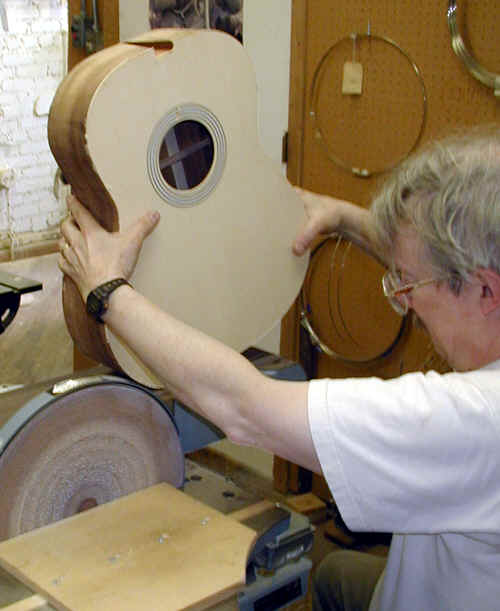
 More of the same. While this step may seem dangerous
(it is not), it is essential if the guitar is to look good. If your
surfaces are not smooth and flat (from side to side) the lacquer will
reveal any imperfections in glaring detail, and will significantly impede
your efforts to produce a marketable "professional" guitar.
More of the same. While this step may seem dangerous
(it is not), it is essential if the guitar is to look good. If your
surfaces are not smooth and flat (from side to side) the lacquer will
reveal any imperfections in glaring detail, and will significantly impede
your efforts to produce a marketable "professional" guitar.
 More
sanding
More
sanding
 And again.
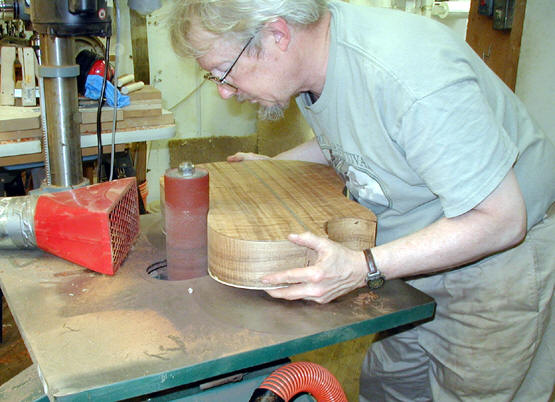 Here I am using the spindle sander to do the waist curve. This tool is
also very helpful for the cutaway.
Here I am using the spindle sander to do the waist curve. This tool is
also very helpful for the cutaway.
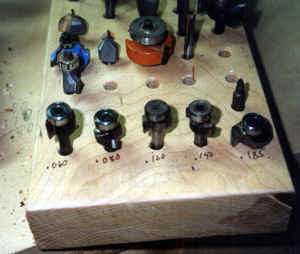 The next step will be to cut the binding ledges on top, back and
sides. These days the luthier supply houses (Stewart MacDonald
and LMI) sell router bits with bearings sized to cut some of the more
common sizes. When I started these were not available and I had
a complete set made by a local machinist. Since then I simply have
them re-sharpened from time to time. One difference between mine
and the commercially available cutters is that they all use a small
bearing (with
no sleeve attached) and the cutter itself is sized to produce the correct
cut. I feel that this makes for a slightly more stable tool that
makes a more accurate and clean cut. In addition, the smaller the
diameter of the cutter, the more accurate the cut - especially on the
back which is curved. Recently I have found another source
for making these bits. Orbit Tools (www.orbittool.com) will make
them from a rather simple drawing and their prices are reasonable (and the
quality is very good.) Another "trick" that I use is that my cutters
are about .015 wider than the binding/purfling that I am using.
The benefit of this is that once the binding is scraped even with the
sides and the sides are finish sanded, the top edge of the binding will
still be full width. To my eye it is very noticeable if binding
varies in width around the top (or back) of the guitar and I try to avoid
this.
The next step will be to cut the binding ledges on top, back and
sides. These days the luthier supply houses (Stewart MacDonald
and LMI) sell router bits with bearings sized to cut some of the more
common sizes. When I started these were not available and I had
a complete set made by a local machinist. Since then I simply have
them re-sharpened from time to time. One difference between mine
and the commercially available cutters is that they all use a small
bearing (with
no sleeve attached) and the cutter itself is sized to produce the correct
cut. I feel that this makes for a slightly more stable tool that
makes a more accurate and clean cut. In addition, the smaller the
diameter of the cutter, the more accurate the cut - especially on the
back which is curved. Recently I have found another source
for making these bits. Orbit Tools (www.orbittool.com) will make
them from a rather simple drawing and their prices are reasonable (and the
quality is very good.) Another "trick" that I use is that my cutters
are about .015 wider than the binding/purfling that I am using.
The benefit of this is that once the binding is scraped even with the
sides and the sides are finish sanded, the top edge of the binding will
still be full width. To my eye it is very noticeable if binding
varies in width around the top (or back) of the guitar and I try to avoid
this.
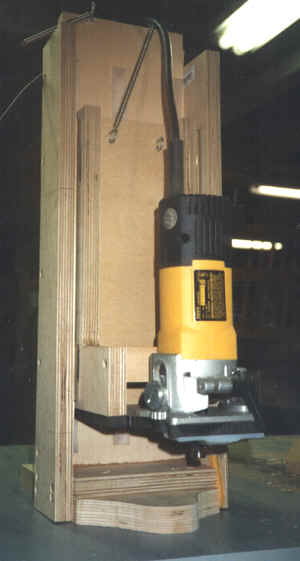 This is my version of the binding jig sold by
LMI (they also sell just the plans). This tool is very helpful
in holding the binding cutter perfectly perpendicular to the sides when
cutting the binding grooves for the back. More on this on the next
page.
This is my version of the binding jig sold by
LMI (they also sell just the plans). This tool is very helpful
in holding the binding cutter perfectly perpendicular to the sides when
cutting the binding grooves for the back. More on this on the next
page.
This website and all of its content, text and images are copyright ©1997-2012 by Charles A. Hoffman. All rights reserved.