FINISHING THE GUITAR - 1
NOTE: The photos on this page are thumbnails. Click on the photo to see the full sized photo.
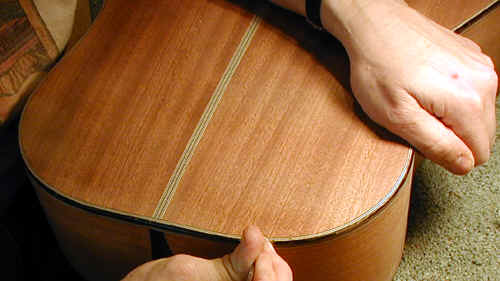
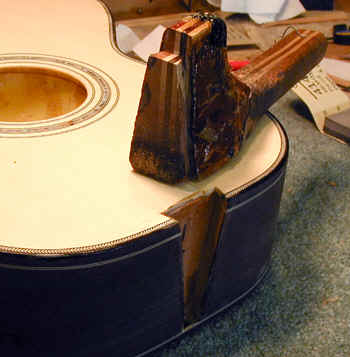
 Once the tape is off the binding the finishing process begins. First
I file and scrape the binding flush with the body - top, back and sides.
Then the sanding process begins. Not much to say about it - tedious
but essential. Here is the butt wedge area after it has been sanded.
Once the tape is off the binding the finishing process begins. First
I file and scrape the binding flush with the body - top, back and sides.
Then the sanding process begins. Not much to say about it - tedious
but essential. Here is the butt wedge area after it has been sanded.
I generally start with a coat of vinyl sealer before the filling process. This means that the wood takes on only a very minimal color from the filler because I like the look of the wood as natural as possible.
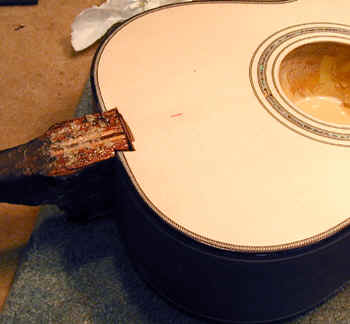
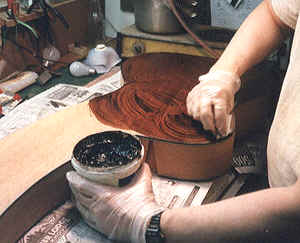 Occasionally I will stain mahogany. Here
I am staining the mahogany back of one of the harp guitars. This
is a water based stain, and works very well. The only problem with
staining is that I must scrape the binding and purfling very carefully
to remove the stain from this decorative feature. For a view
of the scraping process, go here.
Occasionally I will stain mahogany. Here
I am staining the mahogany back of one of the harp guitars. This
is a water based stain, and works very well. The only problem with
staining is that I must scrape the binding and purfling very carefully
to remove the stain from this decorative feature. For a view
of the scraping process, go here.
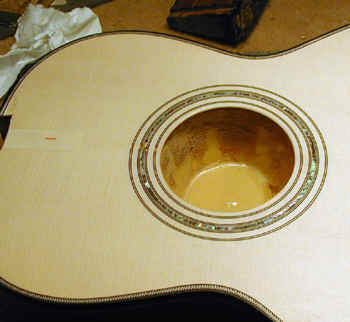
 I use a cup
from sour cream or chip dip (cleaned, of course) to protect the inside
from lacquer while finishing. It is held in place with a piece of
foam rubber.
I use a cup
from sour cream or chip dip (cleaned, of course) to protect the inside
from lacquer while finishing. It is held in place with a piece of
foam rubber.
 I
have a large
number of "handles" for the bodies. These are simple a
piece of wood with a dovetail cut on the end. This makes it much
easier to control the body while spraying.
I
have a large
number of "handles" for the bodies. These are simple a
piece of wood with a dovetail cut on the end. This makes it much
easier to control the body while spraying.
 Voila!!
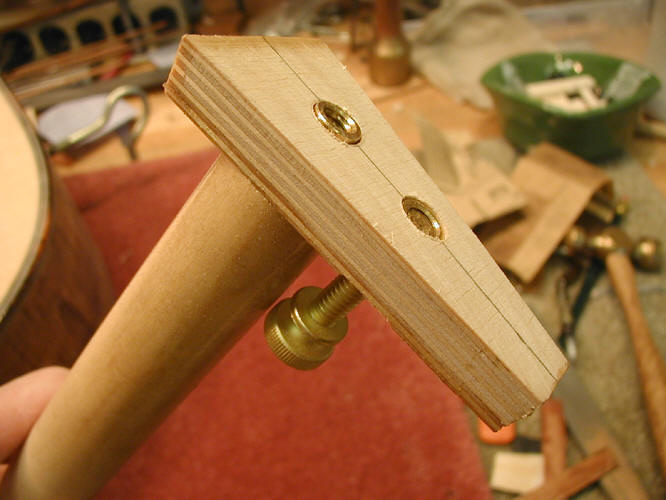
 I have developed a new way of holding the body in the spraybooth.
I made a small dovetail out of 1/2" Baltic birch, used some threaded
inserts and a hangar bolt to create a handle. The advantage is
that the sides of the guitar are completely unobstructed . The
thumbscrew simply screws in until it hits the back of the dovetail on
the body and applies pressure - this makes the handle completely solid
and secure.
I have developed a new way of holding the body in the spraybooth.
I made a small dovetail out of 1/2" Baltic birch, used some threaded
inserts and a hangar bolt to create a handle. The advantage is
that the sides of the guitar are completely unobstructed . The
thumbscrew simply screws in until it hits the back of the dovetail on
the body and applies pressure - this makes the handle completely solid
and secure.
 Another view.
 and another.
 After the body is sanded, I begin the finishing process. I
use nitrocellulose lacquer - like most current makers. I begin with
a vinyl sealer - which is a good sealer and tends to minimize cold checking
of the final finish. The back and sides are then filled with a dark
wood filler, to fill the porous grain, and after suitable drying time,
are sanded back to a clean smooth surface - I find a 220 grit sandpaper
is more than sufficient. Then another coat of vinyl sealer, followed
by lacquer. My regimen is four coats in one day, a week of drying
time, followed by a light sanding with 220 grit fre-cut (stearated)
paper. At this point I start filling any dips, voids or gaps so
that the final finish will be completely smooth. This is followed
by three coats of lacquer and another week or drying time. Then
the guitar is sanded quite heavily, but carefully,(220 grit fre-cut again)
to get a completely smooth surface. Then I apply two final coats
of lacquer. This is allowed to dry for at least one month and is
wet sanded with 600 grit wet or dry paper . A day or two of further
resting time and sanding with 1000 or 1200 grit paper. A couple
days more rest, and I buff the guitar on my Baldor buffer (see tools
page). Some photos of the buffer in use can be found HERE.
Plus one at the end of this page.
After the body is sanded, I begin the finishing process. I
use nitrocellulose lacquer - like most current makers. I begin with
a vinyl sealer - which is a good sealer and tends to minimize cold checking
of the final finish. The back and sides are then filled with a dark
wood filler, to fill the porous grain, and after suitable drying time,
are sanded back to a clean smooth surface - I find a 220 grit sandpaper
is more than sufficient. Then another coat of vinyl sealer, followed
by lacquer. My regimen is four coats in one day, a week of drying
time, followed by a light sanding with 220 grit fre-cut (stearated)
paper. At this point I start filling any dips, voids or gaps so
that the final finish will be completely smooth. This is followed
by three coats of lacquer and another week or drying time. Then
the guitar is sanded quite heavily, but carefully,(220 grit fre-cut again)
to get a completely smooth surface. Then I apply two final coats
of lacquer. This is allowed to dry for at least one month and is
wet sanded with 600 grit wet or dry paper . A day or two of further
resting time and sanding with 1000 or 1200 grit paper. A couple
days more rest, and I buff the guitar on my Baldor buffer (see tools
page). Some photos of the buffer in use can be found HERE.
Plus one at the end of this page.
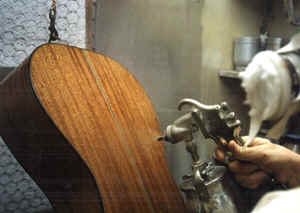
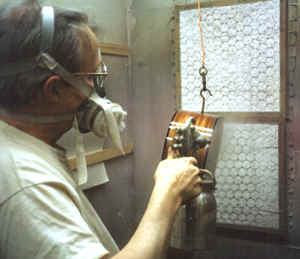 Another photo of spraying. NOTE THE MASK.
 Here I am sanding the body. I use an air powered sander made
by Dynabrade and I absolutely love this tool. It works much better
than electric sanders. Note in the upper left hand corner of the
photo - I am wearing a dust mask. Never forget to do
this.
Here I am sanding the body. I use an air powered sander made
by Dynabrade and I absolutely love this tool. It works much better
than electric sanders. Note in the upper left hand corner of the
photo - I am wearing a dust mask. Never forget to do
this.
I recently bought a downdraft sanding table - a wonderful device that makes sanding much cleaner (and thus safer.)
 More sanding of the body.
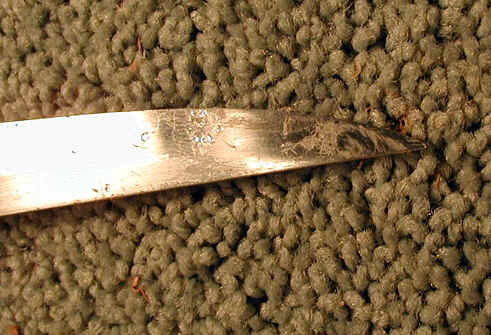
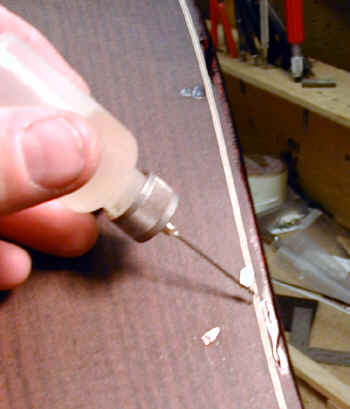
 There are always
a few voids or other imperfections which are visible after the first
sanding (or even before the sanding). These are "drop
filled" with lacquer to bring them up to the level of the rest of the
body. I use this small needle nosed bottle to do this.
There are always
a few voids or other imperfections which are visible after the first
sanding (or even before the sanding). These are "drop
filled" with lacquer to bring them up to the level of the rest of the
body. I use this small needle nosed bottle to do this.
 More
spot filling.
More
spot filling.
 And
more. This is an essential part of finishing if you want a
professional looking finish.
And
more. This is an essential part of finishing if you want a
professional looking finish.
 After the finish is all on, and has had at least a week to cure, I wet
sand it with 600 and 1000 grit wet or dry sandpaper. Here I am
spraying water (with a bit of soap - I use either ivory or Murphy's Oil
soap) . The soap helps lubricate the working surface and minimizes
loading of the sandpaper.
After the finish is all on, and has had at least a week to cure, I wet
sand it with 600 and 1000 grit wet or dry sandpaper. Here I am
spraying water (with a bit of soap - I use either ivory or Murphy's Oil
soap) . The soap helps lubricate the working surface and minimizes
loading of the sandpaper.
 I use an air powered palm sander to do the wet sanding. It has a
very small orbit and does a fine job. It is also much faster that
doing it by hand and much easier on my shoulders and hands.
I use an air powered palm sander to do the wet sanding. It has a
very small orbit and does a fine job. It is also much faster that
doing it by hand and much easier on my shoulders and hands.
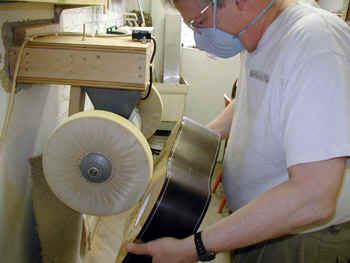 Here I
start the buffing process. If you look carefully you will see that
the wheel is not deformed much - this is because I use a light
touch. All the buffing is done on this lower quadrant of the wheel -
anywhere else on the wheel and it might grab the guitar (or neck) and
throw it. I know this through bitter experience.
Here I
start the buffing process. If you look carefully you will see that
the wheel is not deformed much - this is because I use a light
touch. All the buffing is done on this lower quadrant of the wheel -
anywhere else on the wheel and it might grab the guitar (or neck) and
throw it. I know this through bitter experience.
This website and all of its content, text and images are copyright ©1997-2011 by Charles A. Hoffman. All rights reserved.