MAKING AND INSTALLING LININGS
One of the many small but essential tasks in building the guitar body is making and installing the linings -- the triangular kerfed strips which are glued onto the ribs to provide gluing surface for attaching the top and back. This is a part of the guitar which has little or no acoustic function -- they merely hold the guitar together. Here are some photos of how I do it.
NOTE: These photos are thumbnails. Click on the photo to see the full size version.
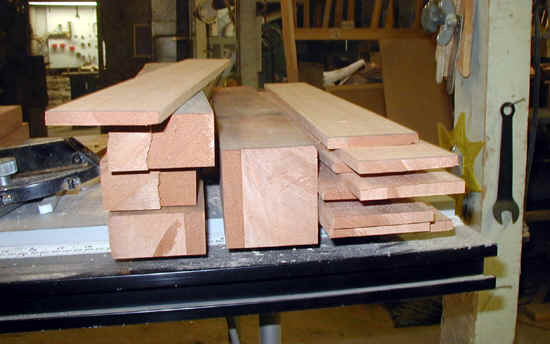
The kerfing I use is made of mahogany. Generally there are strips left over from my neck wood that I can rip into the appropriate size strips. Here you see a stack of Mahogany being sized for making linings. I rip up mahogany into strips as wide as the top of the lining (in my case, this is 5/16")
 I
then rip out strips of linings with the blade set at a 30 degree
angle.
I
then rip out strips of linings with the blade set at a 30 degree
angle.
 Since
the blade must cut into the "fence" to separate the piece, I
attach a wooden backer board to the fence of the saw.
Since
the blade must cut into the "fence" to separate the piece, I
attach a wooden backer board to the fence of the saw.
 This
is what the cut will yield. I do then run the piece thro the saw
with the blade set at 90 degrees and trim off the feather edge of the
lining strip.
This
is what the cut will yield. I do then run the piece thro the saw
with the blade set at 90 degrees and trim off the feather edge of the
lining strip.
 Here is a stack of strips which have not been kerfed.
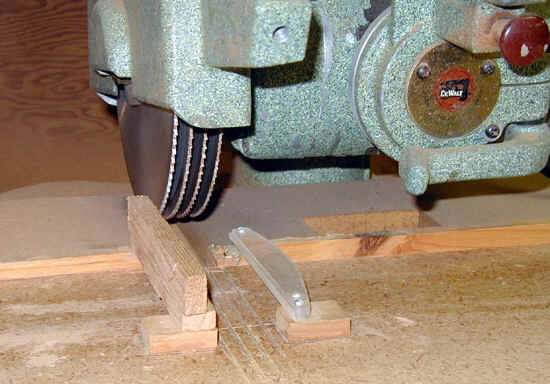 After the strips are made they must be kerfed. In order to speed
up the process and make the kerfs more uniform I took an old radial arm
saw and mounted 4 thin blades (I had the spacers made by a local machinist).
(Look here for another
photo of this tool). I cut the strips 4 at a time. This is a tedious
and boring job, so I try to do several hundred strips at a time, and do
it at a time when I am alert.
After the strips are made they must be kerfed. In order to speed
up the process and make the kerfs more uniform I took an old radial arm
saw and mounted 4 thin blades (I had the spacers made by a local machinist).
(Look here for another
photo of this tool). I cut the strips 4 at a time. This is a tedious
and boring job, so I try to do several hundred strips at a time, and do
it at a time when I am alert.
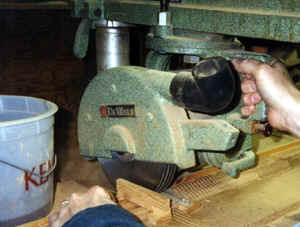 Another view of the process of cutting the kerfs. The small
piece of wood between my hand and the blades is there to prevent any slips
of my hands, which would have disastrous results.
Another view of the process of cutting the kerfs. The small
piece of wood between my hand and the blades is there to prevent any slips
of my hands, which would have disastrous results.
 A pile of completed linings.
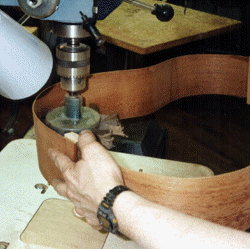 Before the linings are glued to the ribs, the ribs must be sanded.
Although I sand the ribs smooth before bending, the water and heat discolor
and roughen the wood. I used to do this by hand, but now do it with
a flap sander mounted in a drill press. This could also be done
before the end blocks are glued in place.
Before the linings are glued to the ribs, the ribs must be sanded.
Although I sand the ribs smooth before bending, the water and heat discolor
and roughen the wood. I used to do this by hand, but now do it with
a flap sander mounted in a drill press. This could also be done
before the end blocks are glued in place.
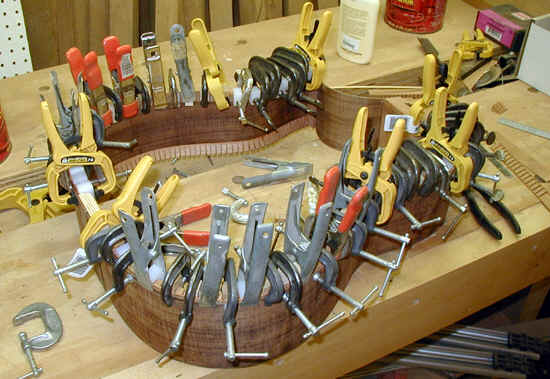
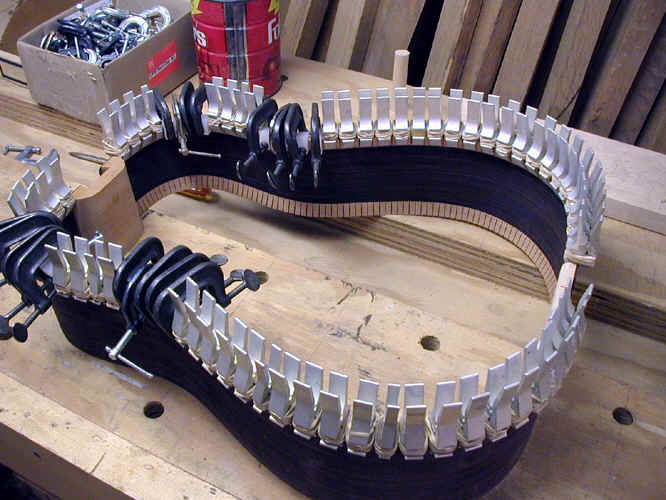
I use a variety of small C clamps and spring clamps to hold the linings
in place for gluing. The real trick is a small caul which I made
which is placed over the linings so that the clamp works on parallel surfaces
(see next photo)
More
of the same.
 Another view.
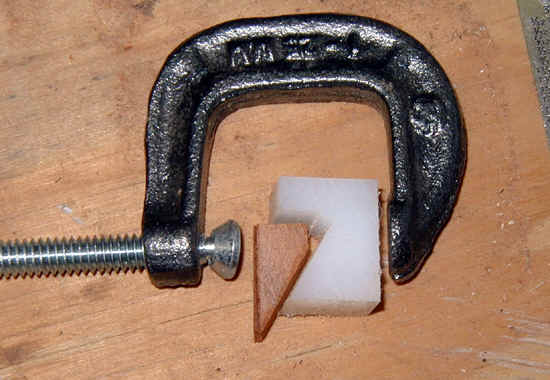 This photo shows the small caul (on the right) I use to facilitate
clamping the linings. I have a box with several hundred of these,
which I made at least 20 years ago. Simple but effective.
This photo shows the small caul (on the right) I use to facilitate
clamping the linings. I have a box with several hundred of these,
which I made at least 20 years ago. Simple but effective.
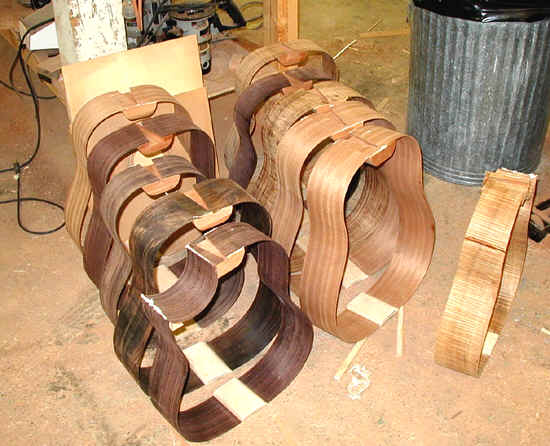 A bunch of ribs (is bunch the correct word??) waiting in line for linings.
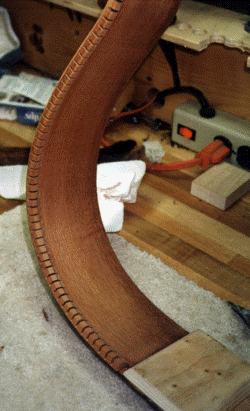 The finished job.
 The alternative to all of the above is to buy premade linings - which I
have recently done. Saves time - more than enough to justify the
cost, particularly given the very high quality.
The alternative to all of the above is to buy premade linings - which I
have recently done. Saves time - more than enough to justify the
cost, particularly given the very high quality.
 the linings I purchase work very well with some specialized clamps
purchased from the Taylor guitar Company which are specifically designed
for gluing in linings. they use surgical rubber tubing or rubber
bands for the spring force.
the linings I purchase work very well with some specialized clamps
purchased from the Taylor guitar Company which are specifically designed
for gluing in linings. they use surgical rubber tubing or rubber
bands for the spring force.
 another view of the same.
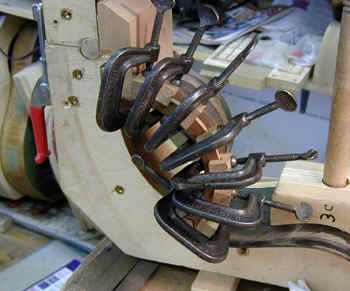
 Here the cutaway is being glued into place. The blocks
have been carefully shaped and carefully shaped cauls are used to clamp
the cutaway in place. This seems relatively straightforward but
is completely dependent on the blocks being carefully shaped.
Here the cutaway is being glued into place. The blocks
have been carefully shaped and carefully shaped cauls are used to clamp
the cutaway in place. This seems relatively straightforward but
is completely dependent on the blocks being carefully shaped.
 Another picture of the same.
 This shows the linings for a cutaway being glued and clamped.
I use a solid rather than kerfed lining for my cutaway. I have always
seen this as a "weak" part of a guitar and try to ensure that
it is strong and won't fail. Many fine makers use a kerfed lining
here, and others do as I do. I am not sure that there is any real
difference.
This shows the linings for a cutaway being glued and clamped.
I use a solid rather than kerfed lining for my cutaway. I have always
seen this as a "weak" part of a guitar and try to ensure that
it is strong and won't fail. Many fine makers use a kerfed lining
here, and others do as I do. I am not sure that there is any real
difference.
This website and all of its content, text and images are copyright ©1997-2011 by Charles A. Hoffman. All rights reserved.