BRIDGE SHAPING
 The
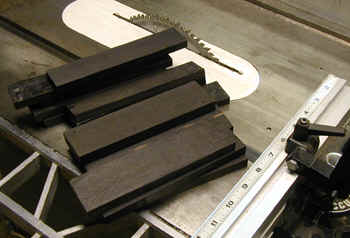
first step in making the bridge is to cut all the blanks to the proper
length. As with many aspects of guitar building, it is
time-effective to do a whole batch at once.
The
first step in making the bridge is to cut all the blanks to the proper
length. As with many aspects of guitar building, it is
time-effective to do a whole batch at once.
 The basic outline of my bridge is cut on the spindle shaper, and
there is photo of this jig HERE.
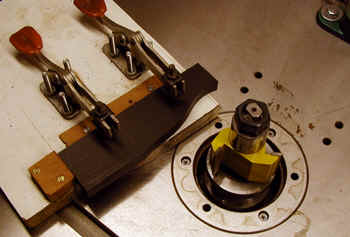
Here I am using the spindle shaper to cut the profile of my
"belly bridge." The jig is one sided - I cut one side and
then flip the blank over to cut the other side. This automatically
makes a symmetrical blank.
The basic outline of my bridge is cut on the spindle shaper, and
there is photo of this jig HERE.
Here I am using the spindle shaper to cut the profile of my
"belly bridge." The jig is one sided - I cut one side and
then flip the blank over to cut the other side. This automatically
makes a symmetrical blank.
The pyramid bridges are quite different. I have started a page on that process HERE.
 After this is done, I rough shape the top of the bridge on my belt sander.
The shape is curved both side to side and from to back, and by a bit of
careful "rolling" I can come quite close.
After this is done, I rough shape the top of the bridge on my belt sander.
The shape is curved both side to side and from to back, and by a bit of
careful "rolling" I can come quite close.
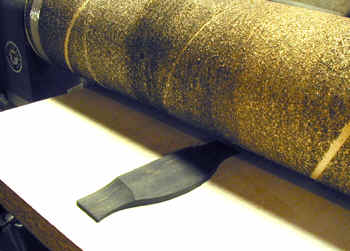
 After the basic shape is created I sand the ears of the bridge to
the correct thickness. The curvature of the ears is created by the
drum sander (which is simply a large drum mounted in my lathe).
After the basic shape is created I sand the ears of the bridge to
the correct thickness. The curvature of the ears is created by the
drum sander (which is simply a large drum mounted in my lathe).
 A closer view.
 This sander can
be set up with finer grits than the sander in my lathe. I use it to
finish sand various parts of the bridge. By varying the degree to
which the drum is inflated, and thus its "hardness", I can use
this for flat surfaces (as shown here) or for curved surfaces such as the
top of the bridge.
This sander can
be set up with finer grits than the sander in my lathe. I use it to
finish sand various parts of the bridge. By varying the degree to
which the drum is inflated, and thus its "hardness", I can use
this for flat surfaces (as shown here) or for curved surfaces such as the
top of the bridge.
These days I use my oscillating spindle shaper for much of the shaping of the bridge. Works wonderfully. I love this tool!!
 The belt sander is used for some more final shaping, and then a small
amount of hand sanding will complete the bridge.
The belt sander is used for some more final shaping, and then a small
amount of hand sanding will complete the bridge.
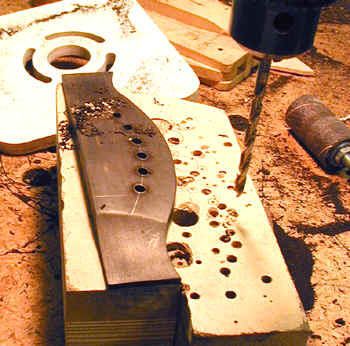 After the
bridge is shaped, I drill the holes. I use an arc to lay out the pin
holes for two reasons. First, I like the look. Second, it may
help to prevent cracked bridges of all of the pin holes are not on the
same grain line. This may or may not be a real advantage. The
next steps are on the next page about gluing a bridge
in place.
After the
bridge is shaped, I drill the holes. I use an arc to lay out the pin
holes for two reasons. First, I like the look. Second, it may
help to prevent cracked bridges of all of the pin holes are not on the
same grain line. This may or may not be a real advantage. The
next steps are on the next page about gluing a bridge
in place.
This website and all of its content, text and images are copyright ©1997-2012 by Charles A. Hoffman. All rights reserved.