WALNUT GUITARS
This page of the web site will follow some aspects of the building of the walnut guitar. The more generic portions of the process will be shown in my new section on building guitars which will be a comprehensive journey through the guitar building process.
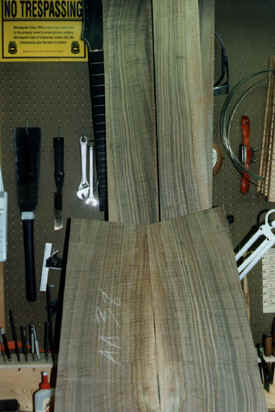 Not
much to show yet. Just the walnut I will be using for these guitars.
(One will be a Dreadnought shape for my customer, one a concert
shape for my own curiosity.) I have joined the backs and the tops.
Next they get rosettes and back stripes, and then sanded to thickness.
More photos to follow.
Not
much to show yet. Just the walnut I will be using for these guitars.
(One will be a Dreadnought shape for my customer, one a concert
shape for my own curiosity.) I have joined the backs and the tops.
Next they get rosettes and back stripes, and then sanded to thickness.
More photos to follow.
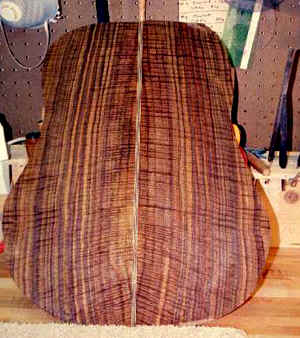 This
photo shows the same wood after the center strip is inlayed, it has been
sanded to thickness and rough profiled. I also wiped the wood with
a wet paper towel to accentuate the grain -- this approximates the look
it will have when it is finished.
This
photo shows the same wood after the center strip is inlayed, it has been
sanded to thickness and rough profiled. I also wiped the wood with
a wet paper towel to accentuate the grain -- this approximates the look
it will have when it is finished.
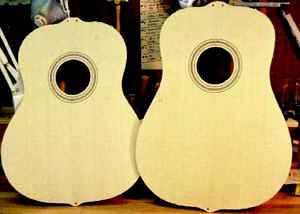 These
are the tops I will use for the walnut guitars (I am making one of each
shape -- concert and D). The rosettes are inlayed, the top thickness
sanded (many thanks to Jim Olson for use of his sander) and the shape
profiled. If you look carefully, you will see two small holes near
the top and one at the bottom. These are used to locate the top
in some of the subsequent jigs I use. More about this as time goes on.
These
are the tops I will use for the walnut guitars (I am making one of each
shape -- concert and D). The rosettes are inlayed, the top thickness
sanded (many thanks to Jim Olson for use of his sander) and the shape
profiled. If you look carefully, you will see two small holes near
the top and one at the bottom. These are used to locate the top
in some of the subsequent jigs I use. More about this as time goes on.
 Construction
of the guitar continues. Shown here is the side after being trimmed
to shape on the spindle shaper. I find that it is easiest to trim
the side to the correct profile before I bend it -- other makers (such
as Jim Olson) do this later in the construction project.
Construction
of the guitar continues. Shown here is the side after being trimmed
to shape on the spindle shaper. I find that it is easiest to trim
the side to the correct profile before I bend it -- other makers (such
as Jim Olson) do this later in the construction project.
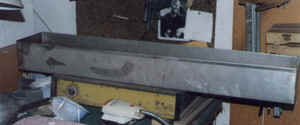 It
is essential to wet the wood before bending it. Some builders merely
moisten the wood, but I have always soaked it in hot water. I use
this trough (which I had made out of stainless steel after my first one
rusted out), and put it on a hot plate. I soak it for about 10 minutes,
which is the time that it takes for my bending jig to heat up to operating
temperature.
It
is essential to wet the wood before bending it. Some builders merely
moisten the wood, but I have always soaked it in hot water. I use
this trough (which I had made out of stainless steel after my first one
rusted out), and put it on a hot plate. I soak it for about 10 minutes,
which is the time that it takes for my bending jig to heat up to operating
temperature.
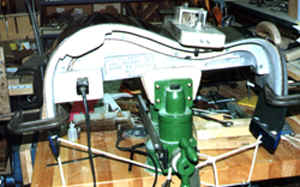 Although
this photo is none too clear, it shows one of the ribs being bent.
I have included another photo of the bending jig on another page.
After the wood is soaked, and the jig is heated, the wood is clamped tightly
to the jig, and heated for about 10 minutes, after which it cools to room
temperature. While the photo doesn't clearly show it, there is a
thin sheet of stainless steel on top of the wood, which is pulled as tight
as possible. This will help keep the rib flat, and is helpful since
the wood normally has a tendency to curl from side to side.
Although
this photo is none too clear, it shows one of the ribs being bent.
I have included another photo of the bending jig on another page.
After the wood is soaked, and the jig is heated, the wood is clamped tightly
to the jig, and heated for about 10 minutes, after which it cools to room
temperature. While the photo doesn't clearly show it, there is a
thin sheet of stainless steel on top of the wood, which is pulled as tight
as possible. This will help keep the rib flat, and is helpful since
the wood normally has a tendency to curl from side to side.
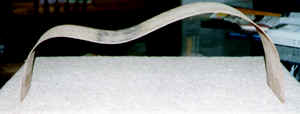 Here
is the first of the ribs, bent.
Here
is the first of the ribs, bent.
This website and all of its content, text and images are copyright ©1997-2011 by Charles A. Hoffman, Inc. All rights reserved.